Canon PIXMA MX452 Printer Driver is the software (middleware) used for connect between notebooks with printers .
If you want download Canon printer driver You need to open the Canon homepage to choose the true driver suitable for the operating system that you run.
However, finding driver for Canon PIXMA MX452 printer on Canon Printer homepage is complicated, because there are so numerous types of Canon drivers for more different types of products: printers, cameras, fax machines, scanners …
This topic I’ll share Canon PIXMA MX452 printers right driver get link to your advantage for quicker download.
Operating system compatible Canon PIXMA MX452 printers driver:
– Canon Printer Driver for Win Xp
– Canon PIXMA MX452 Printer Driver for Microsoft Windows 7 32 bit
– Canon Printers Driver with Windows 7 64 bit
– Download Canon Printer Driver for Windows Vista 32 bit
– Canon PIXMA MX452 Printer Driver with windows Vista 64 bit
– Canon Printer Driver with Win 8 32 bit
– Canon PIXMA MX452 Printers Driver with Microsoft Windows 8 64 bit
– Canon PIXMA MX452 Printer Driver for Microsoft Windows 8.1 32 bit
– Canon PIXMA MX452 Printer Driver with windows 8.1 32 bit
– Canon Printers Driver with Mac operating-system & Linus OS
FREE DOWNLOAD Canon PIXMA MX452 DRIVER
About get and launch the Canon PIXMA MX452 printers driver on Microsoft Windows:
You need help to download Canon PIXMA MX452 printer driver?
Before install the printer driver, your Canon PIXMA MX452 printers must be correctly installed and the machine is ready to print .
– Step 1 turn on the printer & the pc.
– Step 2 Close off the screensaver, antivirus and other driver running on laptop.
– Click get link and the File Get dialog box will view .
– Choose Save This Program to Disk and Save As dialog box appears .
– Choose a folder to save the file in & click Save .
– Storage driver files using Windows Explorer when the get has completed .
– Double click on the Canon PIXMA MX452 files to extract all the Canon PIXMA MX452 driver files to a directory on your hard drive (D, E or Desktop on C Drive). The files will be decompressed with a name same with the name of the printer model that you have downloaded (for example: LBP6000_R101_V102A_W32…). However , you can change the path & directory name while unzip .
Instruction to launch Canon PIXMA MX452 printer drivers ?
– Plug in your Canon PIXMA MX452 to your computer
– View unparked dir & exactly click to the Setup.exe program, then select Open to Run the Canon PIXMA MX452 Driver Installer Program.

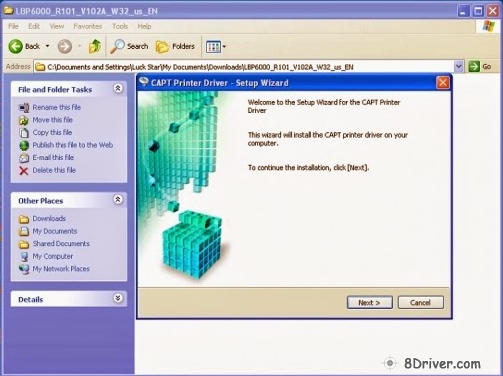
– Next, the CAPT Printers Driver – Setup Wizard will shows, you press “Next” button to start setup your Canon PIXMA MX452 printer driver.
– In the Canon PIXMA MX452 License Agreement – you press to “Yes” button to continue.
– After select “Yes” in License Agreement, the Driver Installer will ask you two options:
+ Manually set port to setup Canon PIXMA MX452 driver
+ Install with USB cable

If you plug in your Canon PIXMA MX452 printers to your computer by USB Cable, please choose option 2: Install with USB connection. Then press “Next” to continue.
– When “Installation cannot be stopped once it starts. Do you want to continue” shows, select to “Yes”.
– Now, Your canon printer will be deploy printer to your pc, please wait:

– After Canon PIXMA MX452 printer installation is complete, You need restart your notebook.
– If your Canon PIXMA MX452 printer driver installation is complete, you will see the Canon PIXMA MX452 icon in the “Printers & Faxes” folder.

Finally you can print with your Canon printer.
Good luck Printers.8Driver.com
Printer.8Driver.com - If this post usefull for you. Please share this post to to your friends by click LIKE FACEBOOK or Google PLUS button(Thanks!).